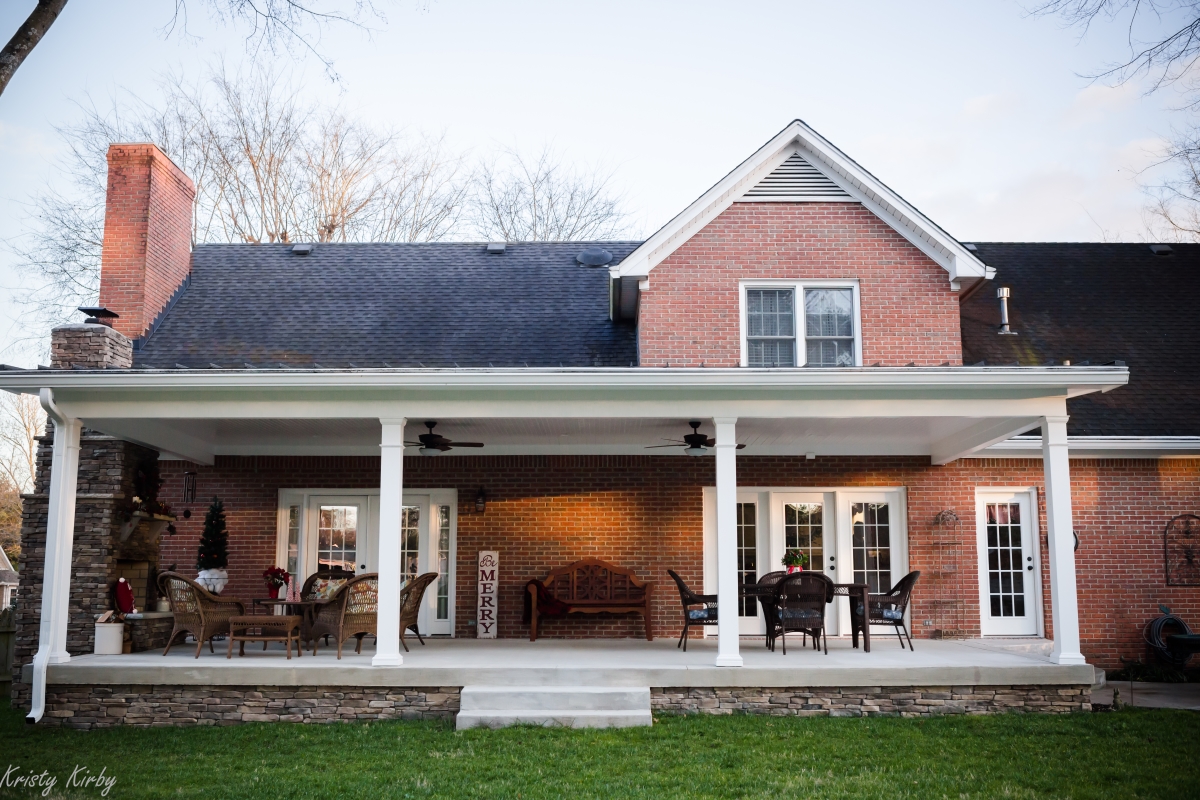
As we look at the beautiful workmanship and design of this wonderful outdoor living space, we want to take you through the design build and why certain material was used for this project.
We started by studying the customer’s wish list. Our homeowners wanted their old sun-room completely demolished first and a new outdoor living space started from scratch, because the existing structure did not have enough entertainment space for their family and friends. After discussing dimensions of the new space, the homeowners felt that a 35’ wide and 15’ deep covered patio would be ideal.
We then focused on other areas that they wanted to look better, such as improving the surface they were walking on. We started with the concrete surface that was around the pool because it was in bad shape and needed some attention. When we demolished the existing sun-room, the floor surface rested on the ground from where we took it and elevated it to be level with the backdoor of the home. We also removed the outdated sliding glass doors and installed custom French doors. This not only provided a stylish entry, but by removing the need for steps we increased the surface area of the new space.
The customer had originally wanted a stamped concrete floor however, after reviewing our options we found that a diamond cut pattern would satisfy their aesthetic needs and create more durability. This also allowed more room in the budget for upgrades on some of the finish work later in the project.
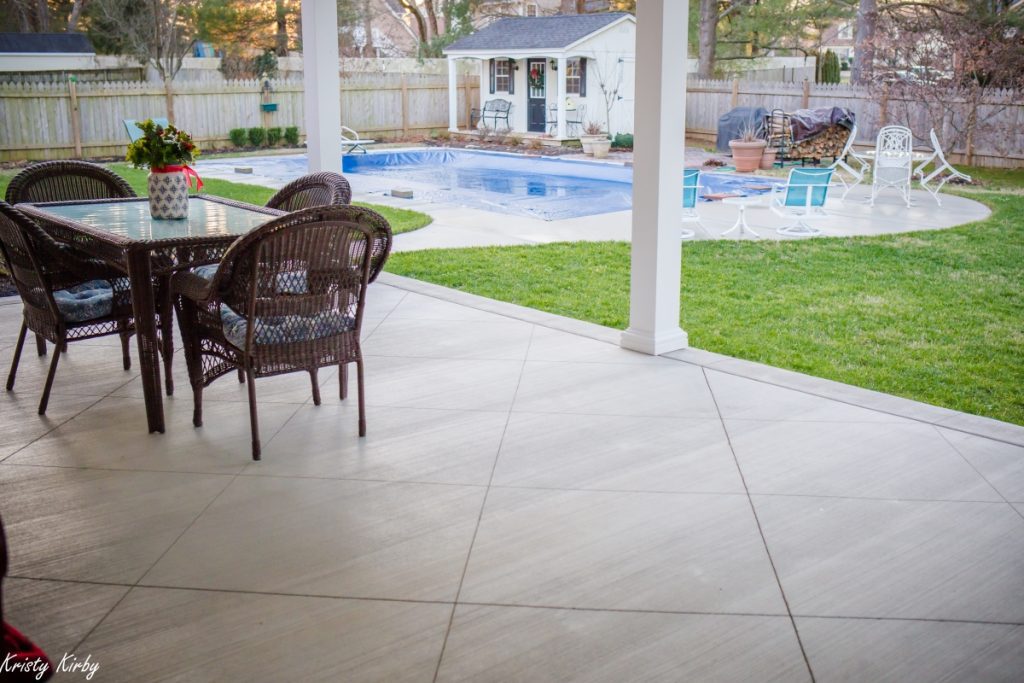
We also installed new concrete around their pool that connected well with the outdoor living space as seen in the picture and added a few half-round steps to provide access to the yard area.
After concrete was laid, stone work began. We installed stacked stone at the base of the structure extending to their fireplace. The stacked stone is an appealing and affordable option used to cover the base block of a structure. Let’s talk about this beauty of a fire place. Knowing this would be the focal point of our entertainment area we spared no expense in building his piece de resistance. At a height of 18’ and 5’6” wide this true masonry fireplace was built with block and fire brick and wrapped in the stacked stone. Also, by ditching the traditional rectangle appearance we opted to narrow it as it approached the chase giving this fireplace a stylish design.
We incorporated a stone top hearth and mantle along with stone brackets in the fireplace. We also installed a gas line with a starter that went to the outdoor living space which makes starting a fire easy and hassle-free.
Moving to framing design and finishes, we were left with couple of options because of how the house was designed and built. A low slopped shed roof and flat ceiling were the best option for this addition. We installed four fiber glass columns that had decorative brackets to give it some character. The columns were bolted into the concrete to make them secure while supporting the weight of the structure.
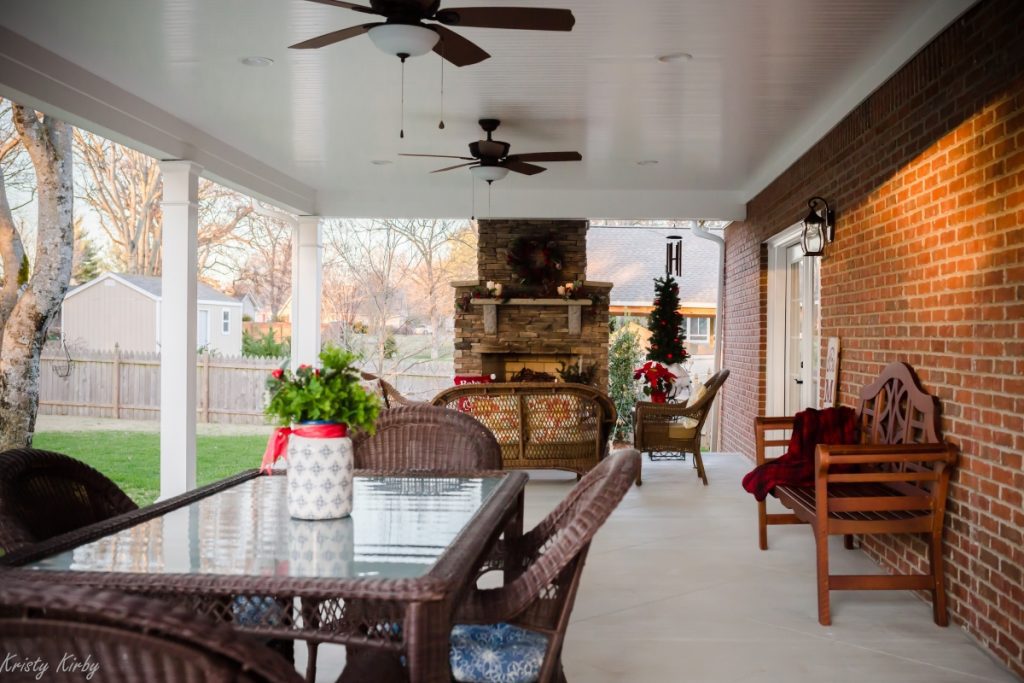
We painted the white ceiling boards with a satin finish so that it wasn’t so shinny and didn’t have a glare to it. We also installed 2 new ceiling fans and 6 can lights, making this giant space feel even bigger at any time of the day. We always strive to include as much lighting as possible to accommodate the space.
Now, looking at the exterior products used in the project we installed James Hardie Lap siding. This was an easy option as James Hardie Fiber Cement Siding is the best on the market. The rich white color that is baked into the product will provide many years of charm and character and because this product is fiber cement our clients won’t have to worry about wood rot or hole boring bugs making this a maintenance free wonderland.
Now to the roof, which is the most important part of any structure. With the dormer windows limiting what we can do with the pitch of the roof, we decided to install new standing seam metal roof. This particular metal roof is the best on the market that hides any and all screws with a standing seam to protect from all-weather types as well as allowing it to be installed on slopes lower than a 3/12 pitch. Since the pitch having to be as low as it was, it made it difficult to see this beautiful roof from the yard. However, it’s peace of mind knowing that they have such a great product up there protecting everything underneath.
When we do these outdoor living spaces there are a couple things that we try to do:
- We make sure that all water flow is controlled, and that it goes where we want it to so that the structure is never affected by any water-related damage.
- We try to make finish materials maintenance-free products (if budget allows), and educate our customers of these products so they can have options to choose from.
We hope enjoyed the details of this project and would love to help guide you on your next project. If you have any questions, please feel free to let us know.


